Create Cases in the Digital Success Portal
This article will show you how to create a Case in the Digital Success Portal.
Create a Case
To create a Case:
1. Sign in to the Digital Success Portal.
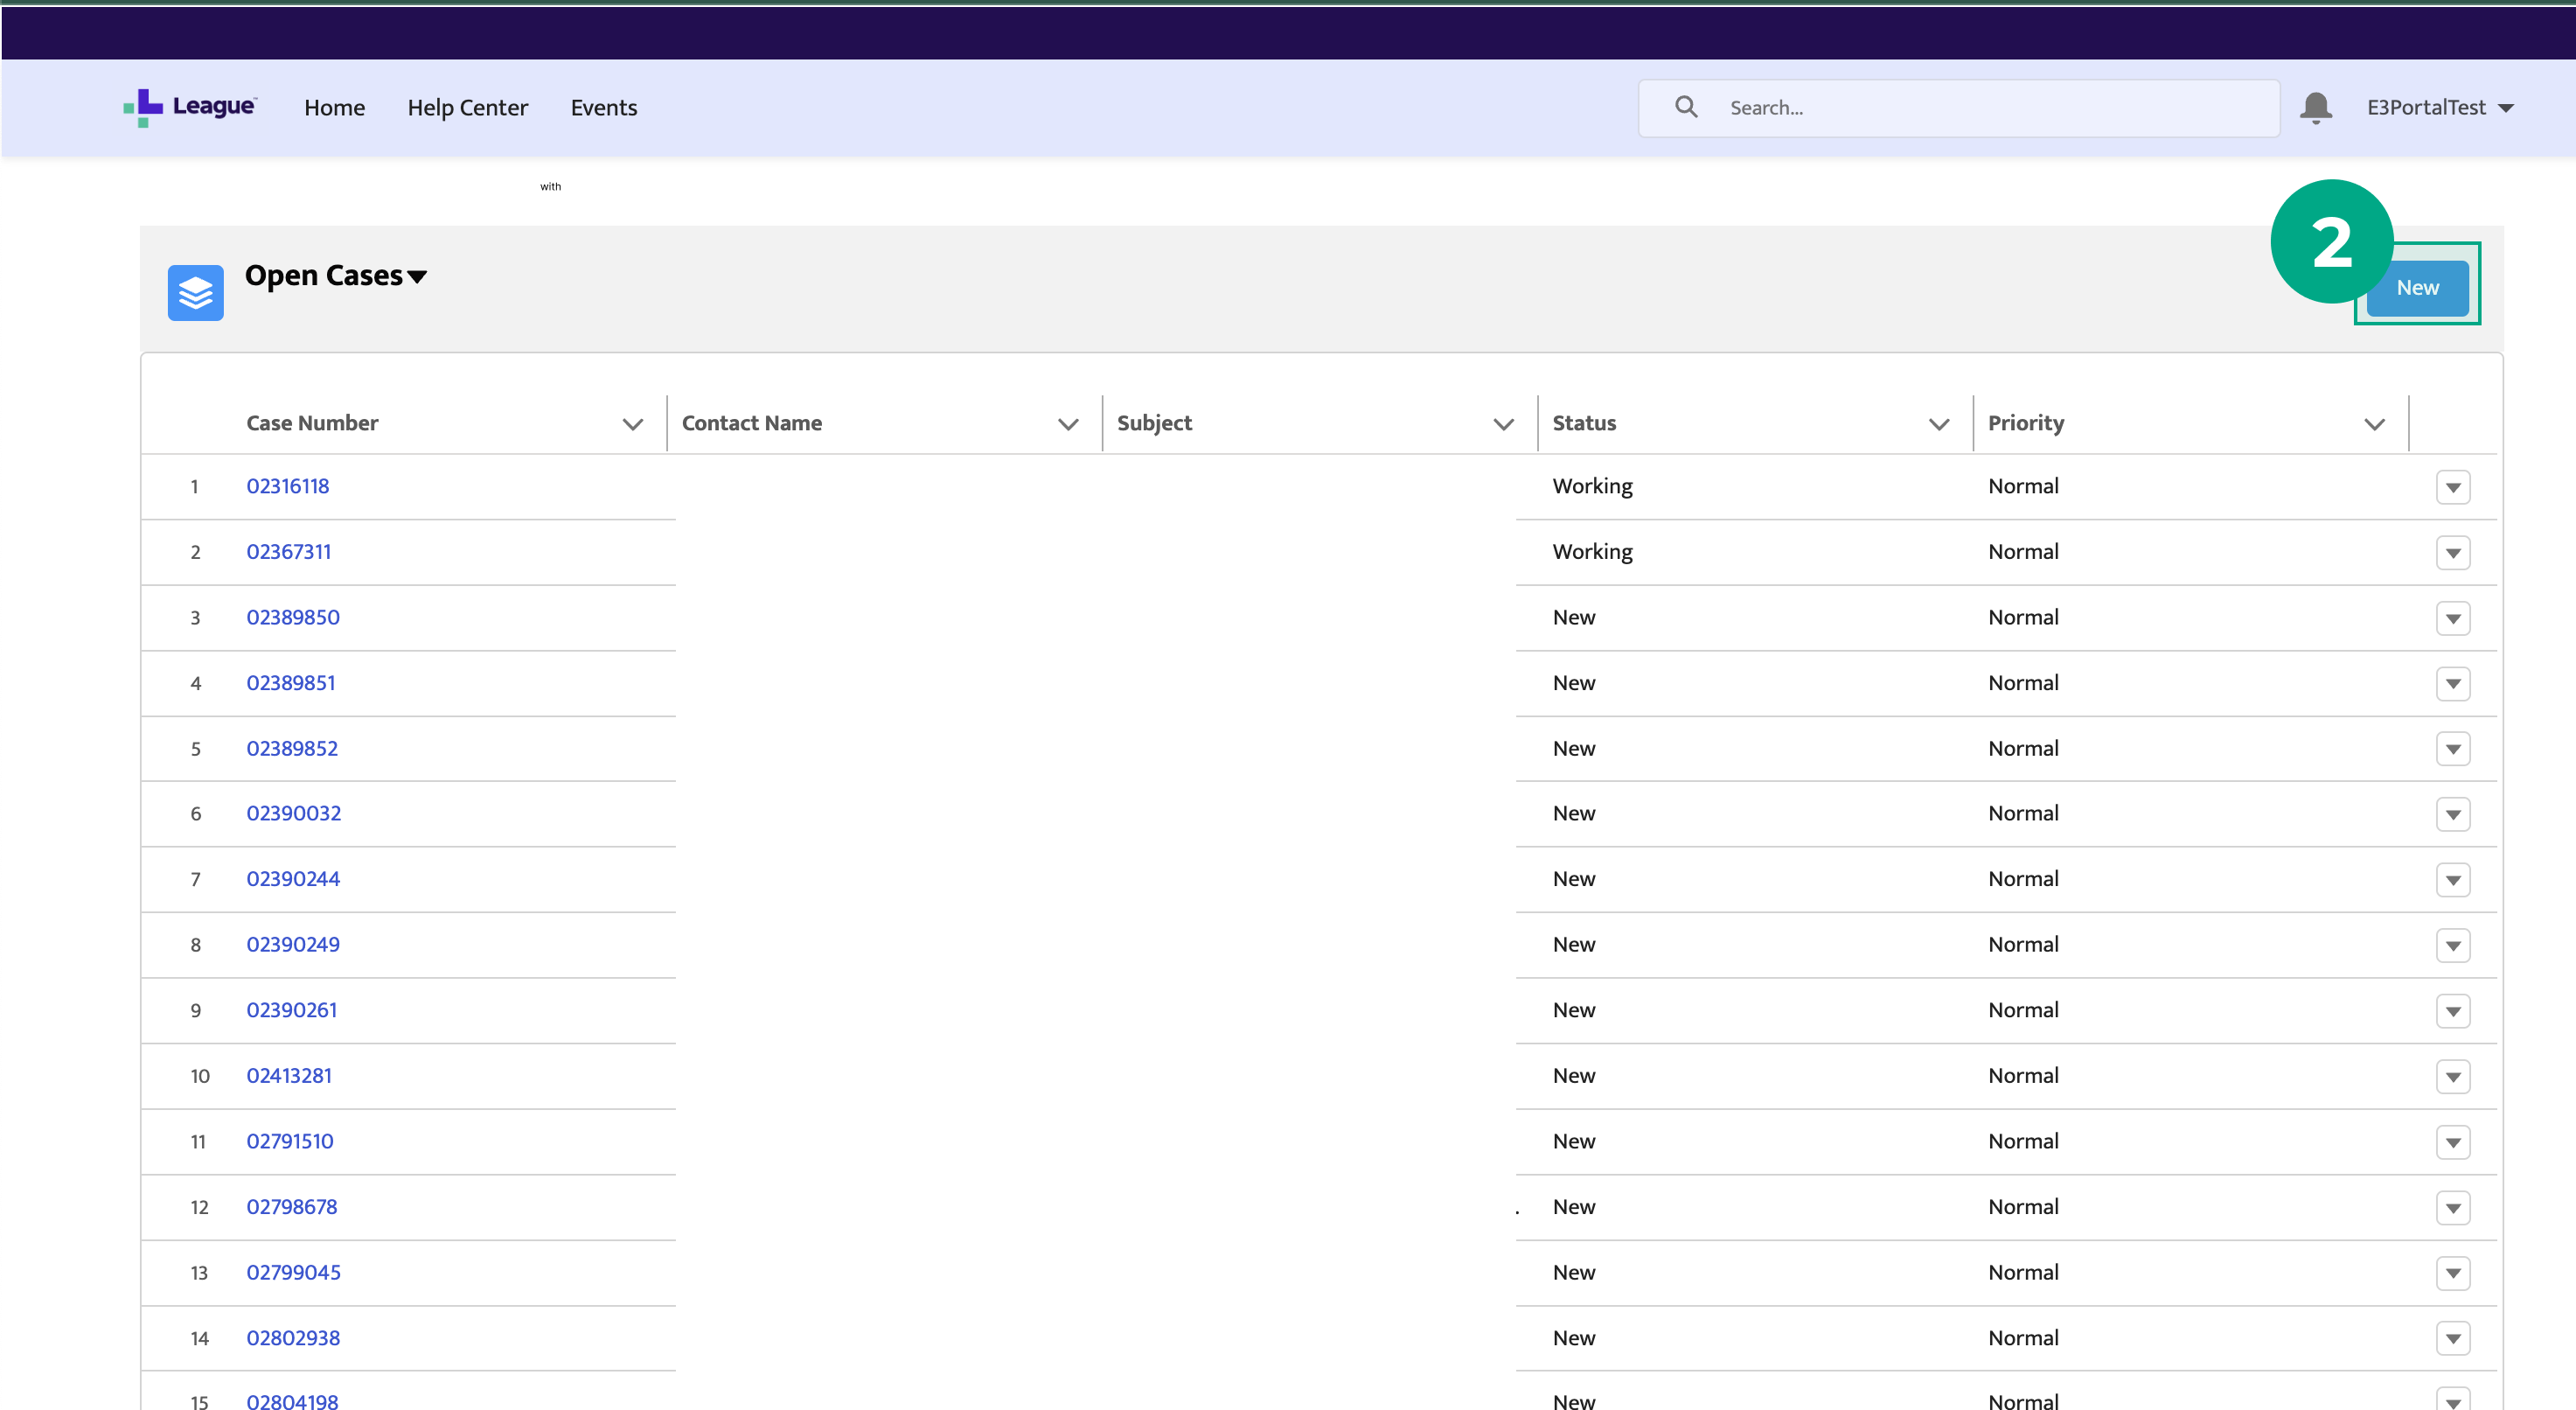
2. Click “New” on the menu bar in the top right-hand corner of the screen.

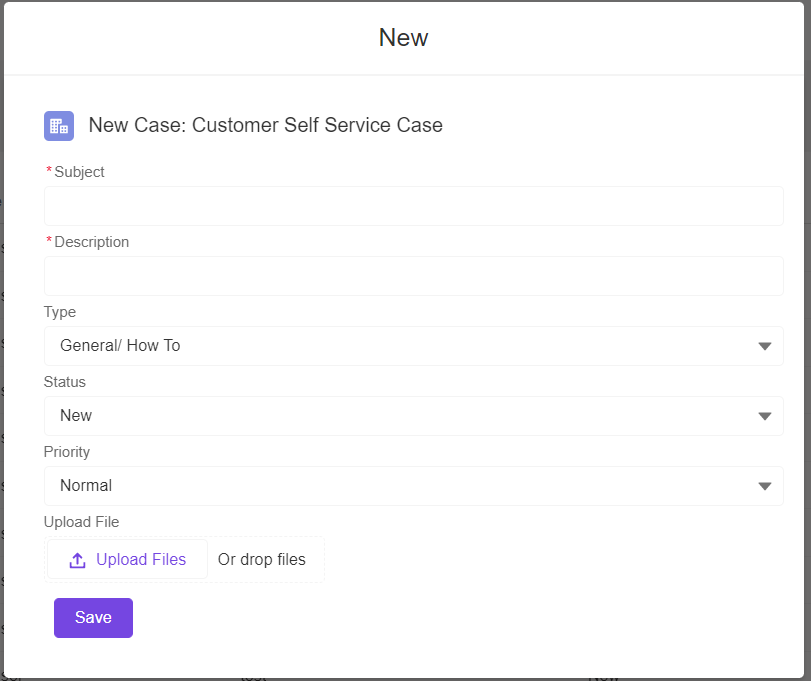
3. Enter a subject and description. The more detailed your description is, the faster we can help. If you're experiencing unexpected behavior, include the steps to reproduce what you're experiencing.
4. Pick a Case type. Your options are:
Advisory - Compliance: Request support from League's Benefit Compliance Specialist.
Advisory - Open Enrollment Support: Request support for Benefits Open Enrollment, including employee communications and open enrollment presentations.
Advisory - Renewal: Access your dedicated League Advisory team member for strategic renewal support, including renewal strategy and negotiation, insurance carrier marketing, and plan design strategy.
Advisory - Service: Request support for day-to-day benefit program service needs, like member claim issues, benefit level inquiries, and documentation needs.
Billing: Report issues with or ask questions about billing
Config change: Request configuration changes that are not member specific
Defect: Let us know when something unexpected happens
General / How-To: General platform questions
Meeting Request: Book a Zoom meeting with a CSM
Member Specific: Questions about a specific member (don't include any personally identifiable information (PII) in the Case)
Open Enrollment: Questions about Open Enrollment
Other: None of the types describes your Case
Renewal: Questions about renewal
Reporting: Questions about reporting or data
Service: Request a service like adding a new wallet card (some services cost extra)
Setup: Setup requests like Digital Success Portal access.
Note: The Case type helps us track the types of questions we receive so we know where we can improve our product, services, and documentation.
5. Don't edit “Status” field. The status defaults to “New”. You can learn more about statuses under “Manage your Cases”.
6. Pick a “Priority” for your Case (High, Normal, or Low). By default, we'll set the priority to "Normal".
Note: While the priority helps us better manage our incoming Cases, we can't guarantee a faster response for high priority cases.
7. Upload any files that illustrate the issue.
8. Click "Save".

Learn more about the Digital Success Portal
.png)